I know it's a lifehack to save water, but admit it. If you saw a jug of bleu cheese and the beginnings of a zen garden in your potty, you'd be alarmed. At least for a moment.

Sunday, November 24, 2013
Fake it 'til you make it: Toilet edition
Look what we found in our downstairs toilet tank! Two large rocks, a container filled with small rocks, and a salad dressing jar filled with what we hope is water.

Saturday, September 14, 2013
Writing on the wall
The past few weeks have been spent taking down wallpaper. The kitchen, dinette, and two bedrooms came down easy, but I swear the foyer, stairway, and upstairs hallway paper were put up with Krazy Glue.
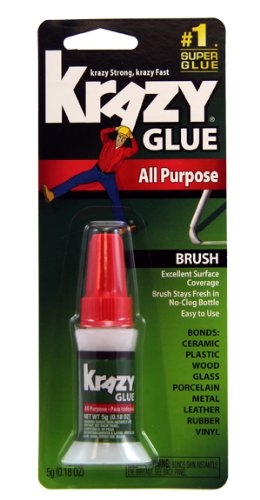 |
| Not just for fingers! |
After much frustration and ripped drywall, I finally found a winning combination. Roman's Piranha wallpaper remover concentrate diluted in a garden sprayer, and an electric steamer. It's time consuming, but the wallpaper is coming down so much easier now.
Along the way, I've found some interesting things written on the wall, probably by the original builder.
Wednesday, September 11, 2013
The not-so-reluctant homeowner!
So... this happened.

Time to revive this blog and chronicle my adventures and misadventures in homeownership!
Stay tuned.

Time to revive this blog and chronicle my adventures and misadventures in homeownership!
Stay tuned.
Thursday, March 7, 2013
Mango and chili powder: Good snack, or GREAT snack?
My favorite snack as of late is mango and chili powder.

It is so, so good. And good for you! I was proud of myself for coming up with it, until I learned it's a pretty common thing.
Some recipes call for salt, lime juice, and other additives. I just cut up a mango, sprinkle chili powder on top, and eat. Though I do love salt, I may have to try that.
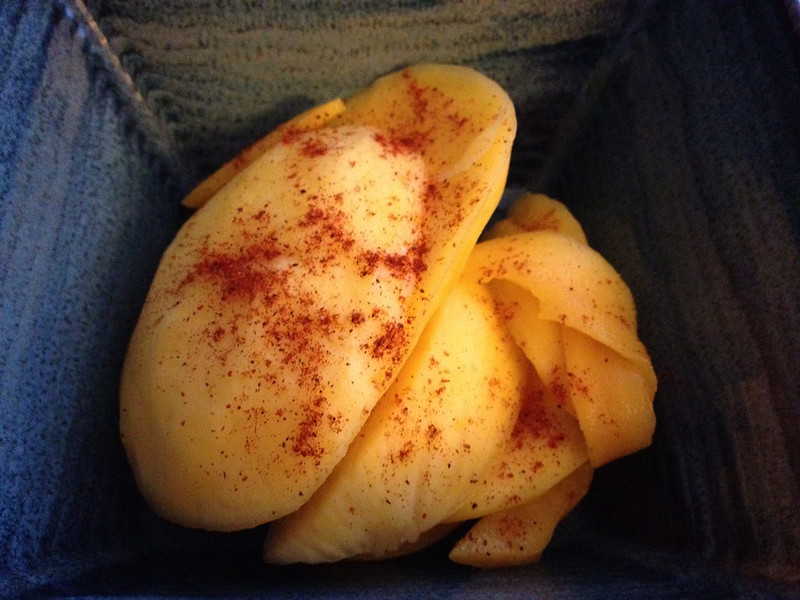
Some recipes call for salt, lime juice, and other additives. I just cut up a mango, sprinkle chili powder on top, and eat. Though I do love salt, I may have to try that.
I've got a system. I buy firm mangos from the supermarket then ripen them at home for 5-7 days. After I cut up the ripe mangos, I buy new ones and the cycle continues. For optimal cutting, well, I haven't gotten that down yet. I've been peeling, then slicing (or hacking, whatever), then gnawing the leftover fruit around the pit like Tom Hanks's baby corn in Big.
The National Mango Board's method is way easier, and it's exactly how I cut avocados! Who knew?
 |
| Sexy. |
I want to work for the National Mango Board so I can tell people I work for the National Mango Board.
What's your healthy snack du jour?
What's your healthy snack du jour?
Tuesday, March 5, 2013
Licensed to Chili
Who doesn't love a good chili? I've been trying to reduce my carb intake, and my usual standby vegetarian recipe with all of its delicious beans just doesn't fit into my plan. Luckily, the first recipe I found when I googled "low carb chili" was a winner. So much so, I've made it twice in two weeks. It's hearty, delicious, easy to make, and you probably have most of these items in your kitchen already. Can't beat that!
Low Carb Chili
Adapted from Food.com
Ingredients:
Directions:

When I first tasted it, it reminded me of sloppy joes, which reminded me of this:

Low Carb Chili
Adapted from Food.com
Ingredients:
- Water
- 2 lbs ground meat
- 1 6-oz can tomato paste
- 1 onion, chopped
- 2 cloves garlic, mashed
- 1 green bell pepper, chopped
- 8 oz fresh baby bella mushrooms, chopped
- 1/2 teaspoon allspice
- 1/2 teaspoon crushed red pepper (add more if you like it hot!)
- 1 teaspoon Worcestershire sauce
- 1 teaspoon cinnamon
- 1 teaspoon cumin
- 2 teaspoons salt
- 1 teaspoon black pepper
- 2 tablespoons chili powder
- 3 bay leaves
Directions:
- Chop up the mushrooms, onion, pepper, and garlic.
- Brown meat in a large pot. Drain some or all of the fat, depending on your preference. I used ground turkey the first time, and ground chicken the next.
Neither meat gave off much fat, so I just left it in. Mmm, fat. - Stir in everything else EXCEPT the tomato paste and water. I like to think the spices soaked into the meat before I added the liquids. Is it true? I don't know. Don't crush my dreams.
- Add tomato paste, then water. The original recipe calls for a quart of water, but I did ok with 3 to 3.5 cups + the meat fat, to where it almost covered everything in the pot. The more liquid you add, the more you'll have to cook off anyway.
- Bring everything to a boil, then simmer uncovered until you've reached the desired chili consistency. Took me a few hours. It was pure torture because it smelled so good.
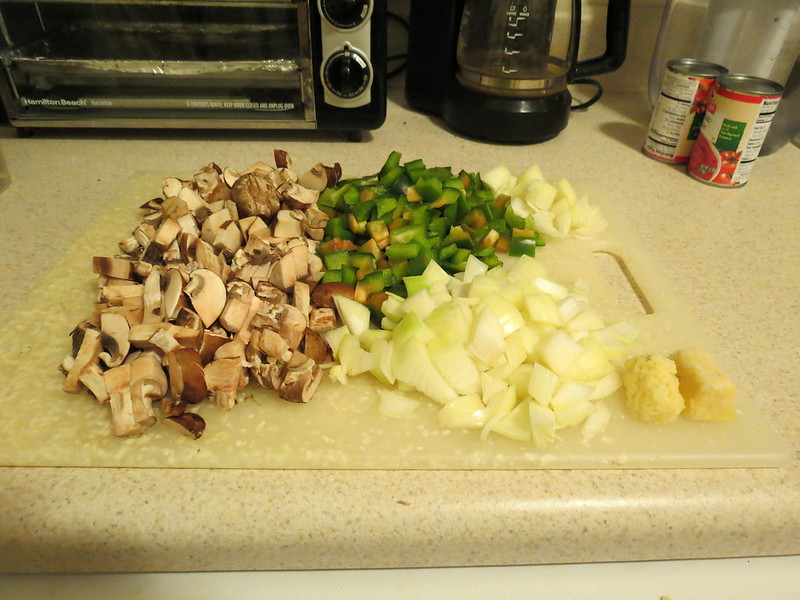 |
| Lower right: Two cubes of frozen minced garlic Idea credit: Kalyn's Kitchen |


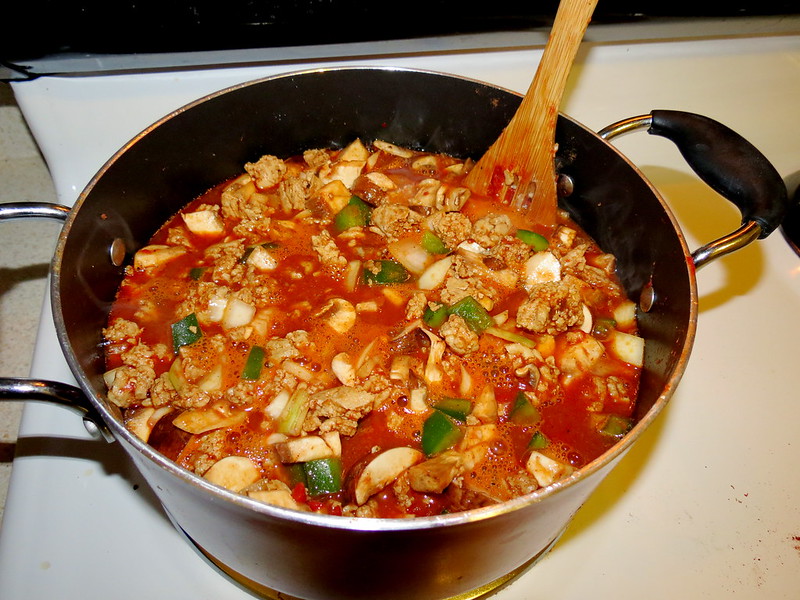

When I first tasted it, it reminded me of sloppy joes, which reminded me of this:
Have you ever cooked anything that unexpectedly reminded you of your youth? I promise that this chili is much better than anything you ever ate in high school. Even that awful frozen pizza that you won't admit you loved.

Tuesday, February 26, 2013
Non-Rice Krispy Cereal Treats
I don't know why I stopped eating cereal, but I've had a half-empty box of Cheerios for about a year, and an unopened box of Franken Berry since Halloween.
What's a girl to do with old cereal? Add marshmallows!

What's a girl to do with old cereal? Add marshmallows!

But Andrea! Doesn't Franken Berry already have marshmallows?
Yes. I fail to see the problem here.
I'm sold! How do I make these delightful confections?
The same way you make Rice Krispies Treats.
- Melt half a stick a butter in a big pot.
- Dump a whole bag of mini marshmallows into the pot.
- Stir until all marshmallows have melted into a blob of fluff-like goodness.
- Stir in cereal until desired cereal-to-marshmallow ratio is reached. I prefer my treats on the goopier side.
- Pour into a greased pan and let cool.
 |
| Boo! |
I'm tempted to go out and buy the most not-fun cereal I can find and make marshmallow treats with it. Let's be honest, it'd be the only way to get me to eat bran flakes voluntarily.

Friday, September 21, 2012
Zucchini Bread
People at my office always bring food and leave it in the break room. Cupcakes, pie, doughnuts, you name it. I call it "throwing it to the wolves", and I mean that in the nicest possible way. It always, always disappears quickly.
It's great if you need to get rid of leftovers. My leftover Thanksgiving desserts and Easter candy? Gone by lunchtime on both occasions.
This summer was the summer of zucchini. Bags of it in the break room, multiple times per week. I don't garden, so I don't know... is zucchini a weed? Does it multiply like tribbles? Everyone I know with a garden is always trying to unload extra zucchini. Anyway, I took one, and decided to bake my mom's zucchini bread.
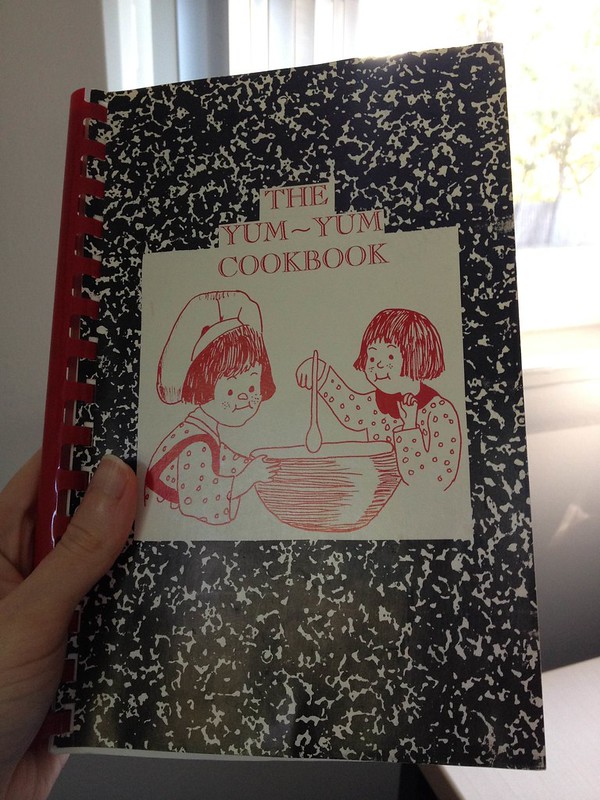
Growing up, Mom also grew way more zucchini than she knew what to do with, so she made zucchini bread. Lots of zucchini bread. She'd give loaves away to everyone, and I'm told it was quite the hot commodity. So much so she published her recipe in my elementary school's PTA cookbook. I still have a copy.
Zucchini bread is really easy to make. Apart from the zucchini itself, you probably already have all of the ingredients. The only part I hated was the grating. I need a food processor.
It's great if you need to get rid of leftovers. My leftover Thanksgiving desserts and Easter candy? Gone by lunchtime on both occasions.
This summer was the summer of zucchini. Bags of it in the break room, multiple times per week. I don't garden, so I don't know... is zucchini a weed? Does it multiply like tribbles? Everyone I know with a garden is always trying to unload extra zucchini. Anyway, I took one, and decided to bake my mom's zucchini bread.
Growing up, Mom also grew way more zucchini than she knew what to do with, so she made zucchini bread. Lots of zucchini bread. She'd give loaves away to everyone, and I'm told it was quite the hot commodity. So much so she published her recipe in my elementary school's PTA cookbook. I still have a copy.
 |
| Cute, right? |
Zucchini bread is really easy to make. Apart from the zucchini itself, you probably already have all of the ingredients. The only part I hated was the grating. I need a food processor.
 |
| I started with this... (That's what she said?) |
 |
|
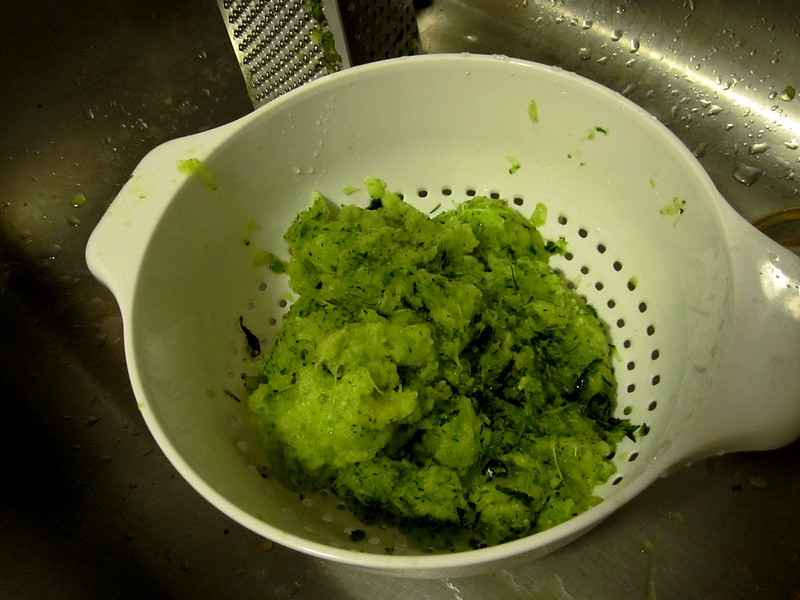
...and ended with this. Not pictured: My blood, sweat and tears. (That's what she said?) |
Three cups of grated zucchini from that monster. Mom's recipe uses 2 cups. I honestly expected more from you, zucchini.
Anyway, on to the recipes!
Anyway, on to the recipes!
Friday, August 3, 2012
Shrimp Pad Thai, Take 1
I promised I'd write about my first Pad Thai experience! What can I say, I love Thai food.
It didn't turn out horribly, but it wasn't great either. The tastes were right, but the texture and the whole experience of the dish was way off. Luckily, I know exactly what went wrong, so I know what to do to make it better next time. Heed these words of wisdom and learn from my mistakes!
Mistake #1: Forgot to check on noodles and didn't rinse with cold water thoroughly
Result: Mushy, overcooked noodles
Solution: Keep a better eye on the noodles as they boil, and rinse them better.
Mistake #2: Dumped freezer burned shrimp, complete with ice crystals, into pot.
Result: Dish came out soupy. Watery straight-out-of-package tofu may have also contributed.
Solution: Use fresh shrimp, or thaw and drain frozen shrimp. Also pre-fry tofu or buy extra firm tofu next time.
Mistake #3: Cracked egg directly on top of cooking food instead of pushing food aside and cracking into empty space in pan
Result: Weird egg white specks throughout dish instead of those nice yellow chunks-o-scrambled-egg
Solution: Follow the recipe, jerk (me, not you)
The morals of the story are 1) don't do what I did, and 2) don't be a jerk. The latter can be applied to almost any situation, how's that for efficiency?
Shrimp Pad Thai
From Skinnytaste
Ingredients:
Directions:


It didn't turn out horribly, but it wasn't great either. The tastes were right, but the texture and the whole experience of the dish was way off. Luckily, I know exactly what went wrong, so I know what to do to make it better next time. Heed these words of wisdom and learn from my mistakes!
Mistake #1: Forgot to check on noodles and didn't rinse with cold water thoroughly
Result: Mushy, overcooked noodles
Solution: Keep a better eye on the noodles as they boil, and rinse them better.
Mistake #2: Dumped freezer burned shrimp, complete with ice crystals, into pot.
Result: Dish came out soupy. Watery straight-out-of-package tofu may have also contributed.
Solution: Use fresh shrimp, or thaw and drain frozen shrimp. Also pre-fry tofu or buy extra firm tofu next time.
Mistake #3: Cracked egg directly on top of cooking food instead of pushing food aside and cracking into empty space in pan
Result: Weird egg white specks throughout dish instead of those nice yellow chunks-o-scrambled-egg
Solution: Follow the recipe, jerk (me, not you)
The morals of the story are 1) don't do what I did, and 2) don't be a jerk. The latter can be applied to almost any situation, how's that for efficiency?
Shrimp Pad Thai
From Skinnytaste
Ingredients:
- 2 tsp oil
- 1.5 tbsp fish sauce
- 1 tbsp sugar
- 2 tbsp water
- 1 tbsp rice vinegar
- 1 tsp chili powder or to taste
- 3 oz rice noodles or rice sticks
- 1 clove garlic, minced
- 6 oz medium shrimp, peeled and deveined
- 2 oz firm tofu, cut into slices (optional)
- 1 large egg
- 1 large egg white
- 5 oz bean sprouts
- 1 oz Chinese chives or scallions, cut into 2-inch pieces
- 1 tbsp crushed peanuts
- lime wedges
Directions:
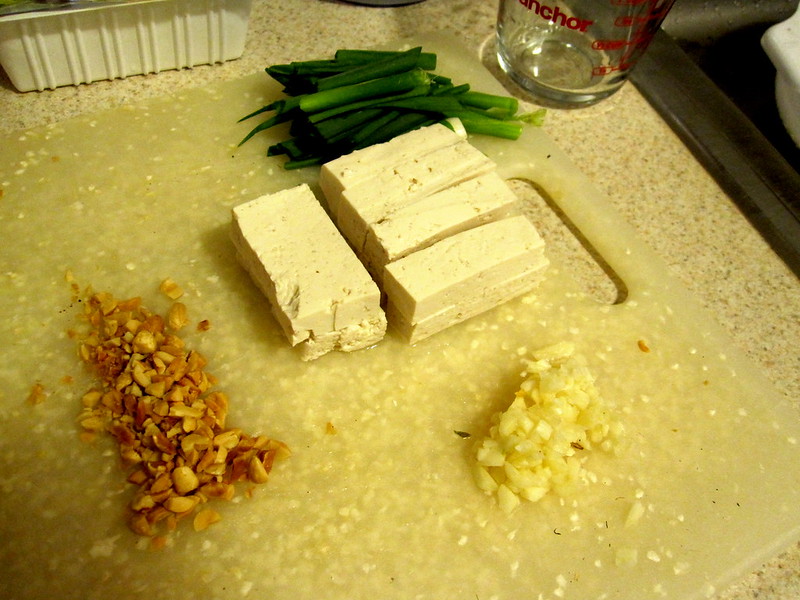
- Prepare chives, tofu, garlic and peanuts and set aside. This recipe moves quickly, and I'm a slow chopper. Not a good combination. Cutting everything up beforehand makes things so much easier!
- Prepare noodles according to package, rinse with cold water and drain (seriously).
- Mix fish sauce, sugar, water, rice vinegar and chili powder in a small bowl, set aside.
- Heat large skillet on high and add oil.
- When oil is hot, add garlic. Stir until you can smell the garlic.
- Add tofu and shrimp and keep stirring.
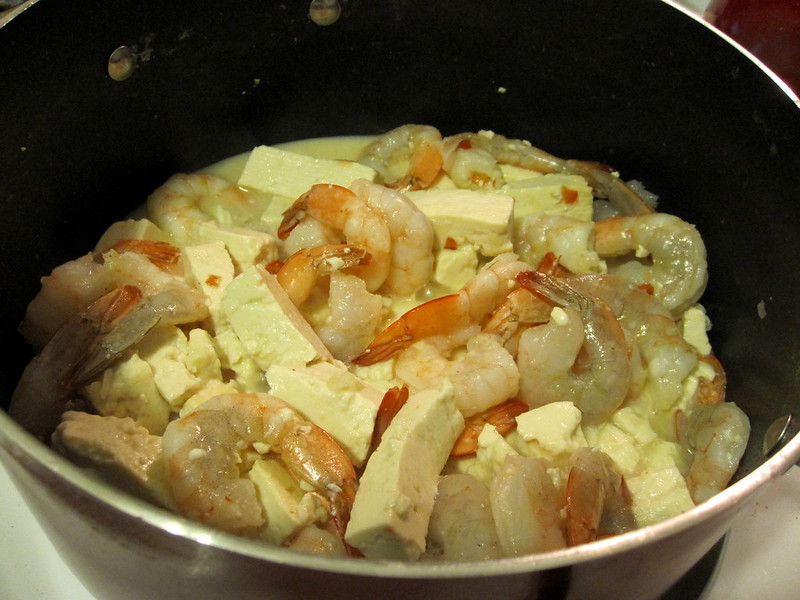 |
| See? Soupy! |
- When shrimp changes color, add noodles. Stir for 30 seconds.
- Use a big spatula to push the food to one side of the skillet, then crack an egg into the empty part of the skillet.
- Break the yolk with a spatula and let cook for about 30 seconds.
- Combine egg with rest of food.
- Add sauce and stir to combine.
- Add bean sprouts and chives and keep stirring.
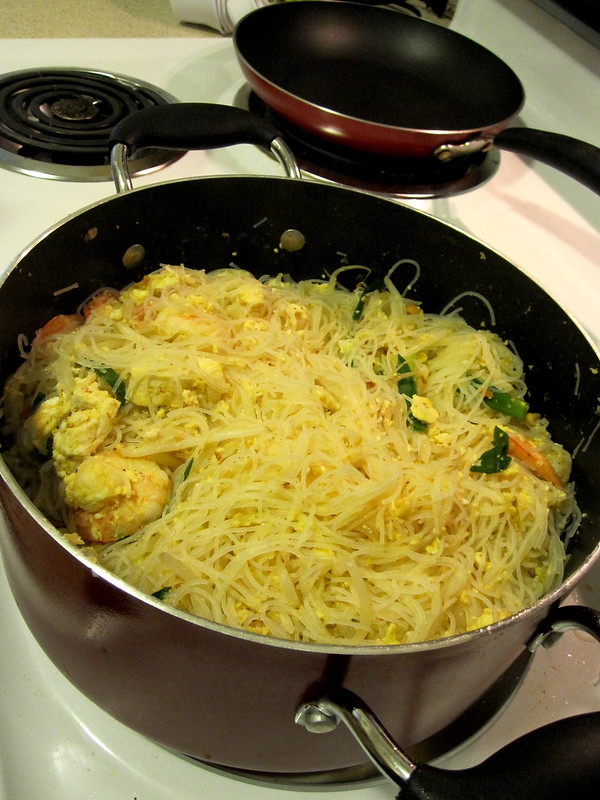 |
| Hard to tell, but still soupy. |
- When sprouts are done, add peanut.
- Turn off heat and serve immediately with lime wedges.
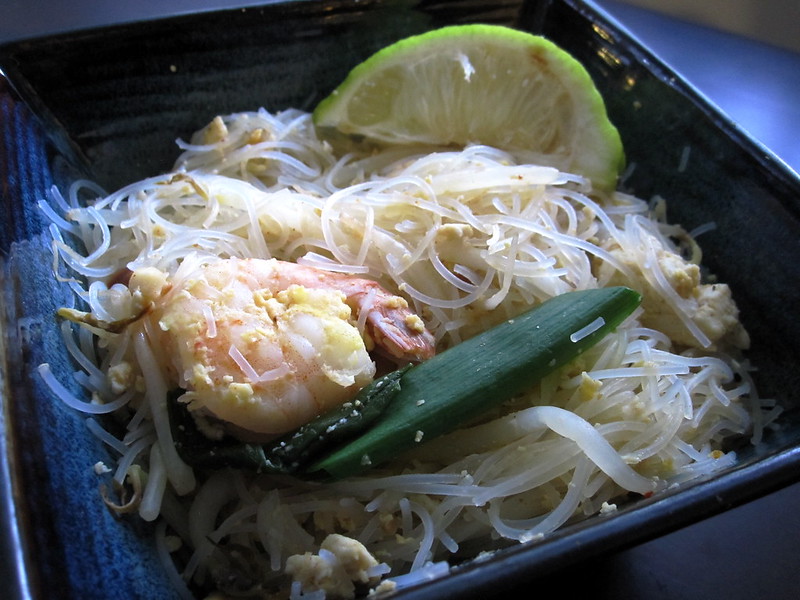
Like I said, it wasn't a complete disaster, so I'll definitely try this one again. If at first you don't succeed and all that.


Tuesday, July 31, 2012
Rockin' the Guac
I reached out to the Twitterverse for suggestions on what to do with my windfall of salsa and guac from the Emily Bites Wholly Guacamole giveaway. Ms. Bites herself suggested taco cupcakes. Who am I to bite the hand that feeds me, especially when she also (indirectly) fed one Anderson Cooper?
Working with wonton wrappers was surprisingly easy. They come pre-floured so they don't stick together, and you can freeze what you don't use.
You'll find I deviated a bit from Emily's recipe to account for personal taste and to make enough leftovers for lunches. It's not the healthiest of meals, but it's fun to make and eat. If you have leftover meat and toppings, make yourself some rockin' taco salads. There is no downside to any of this.
Taco "Cupcakes"
Adapted from Emily Bites
Ingredients
Directions:


Working with wonton wrappers was surprisingly easy. They come pre-floured so they don't stick together, and you can freeze what you don't use.
You'll find I deviated a bit from Emily's recipe to account for personal taste and to make enough leftovers for lunches. It's not the healthiest of meals, but it's fun to make and eat. If you have leftover meat and toppings, make yourself some rockin' taco salads. There is no downside to any of this.
Taco "Cupcakes"
Adapted from Emily Bites
Ingredients
- 1 lb ground chicken
- 1/2 packet taco seasoning
- 1 can black beans, drained and rinsed
- 24 wonton wrappers - Found in the produce section
- Salsa con queso
- Chunky salsa - Wholly Guacamole Classic Medium, of course!
- Shredded Mexican cheese
Directions:
- Preheat oven to 375. Spray muffin tin with non-stick spray and set aside.
- Add chicken to skillet, then add taco seasoning. Stir occasionally until browned.
- Add black beans and keep cooking until warm.
- Press a wonton wrapper into each cup of the muffin tin.
- Dab about a teaspoon of the salsa con queso into each cup and spread it out around the bottom.
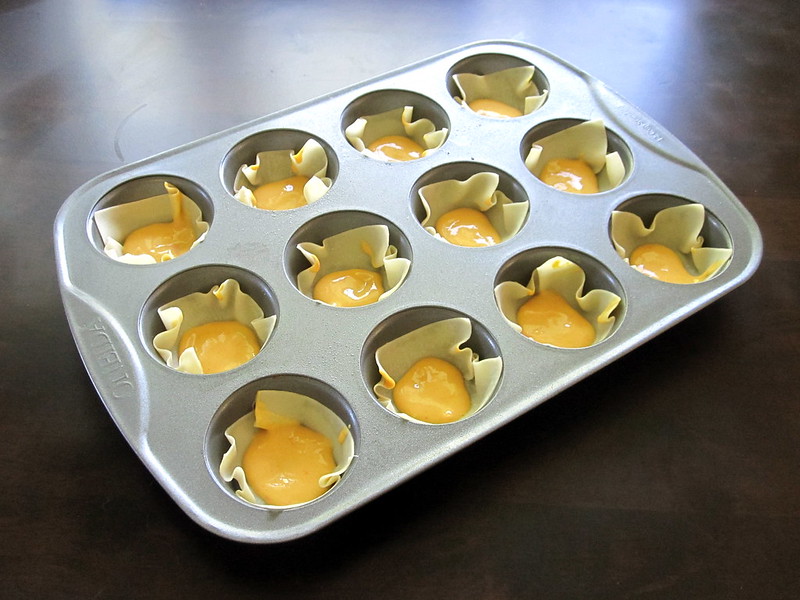 |
| Yeah... that's more than a teaspoon. |
- Add about a tablespoon of the chicken/bean mixture to each cup.
- Add just enough salsa to cover, then sprinkle shredded cheese on top.

- Press another wonton wrapper on top to smoosh everything down (but not too much), rotated 45 degrees from the first wrapper for maximum visual appeal.
- Repeat steps 5-7.
- Bake 18-20 minutes or until golden brown. Let cool for a few minutes before removing from the muffin tin.

- Dab your favorite Wholly Guacamole on top, and enjoy!
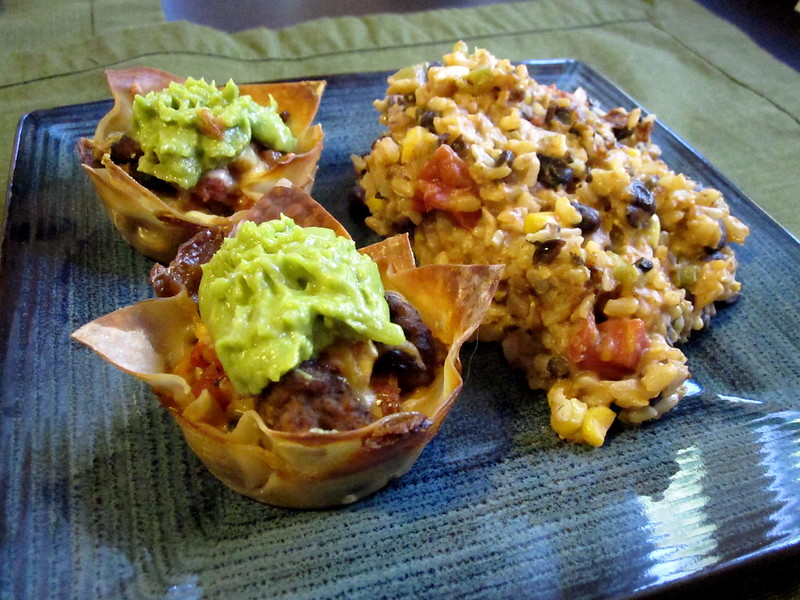 |
| Served with Emily Bites' Cheesy Amazing Mexi-Rice, which was both cheesy and amazing. |

Thursday, July 12, 2012
Don't make me tongue Thai'd: Coconut Curry Shrimp
I like Thai food. And coconut. A lot. I made that chicken coconut soup a while back, and I'll be sharing my semi-successful first attempt at Pad Thai... someday.
Recipes containing "Thai" and "coconut" have a 99.999% chance of getting pinned. The .001% accounts for the possibility of an accompanying terrible ingredient like raisins. Or hair (but mostly raisins). Lucky for me, Skinnytaste's Red Thai Coconut Curry Shrimp contains neither.
I was a little nervous going into this, as my biggest successes so far have been soups, salads, baked goods and crock pot dinners... AKA dump stuff in a bowl then either eat it right away or wait until it's done. This was easy peasy though, and so good! I love the way it makes my whole apartment smell like coconut.
I linked some of the ingredients below so you can see which brands I used. Your local supermarket should have all of this stuff. This recipe moves fast, but you'll be fine as long as you chop and mince everything beforehand. With rice, it made enough for 4 lunches.
Red Thai Coconut Curry Shrimp
From Skinnytaste
Ingredients
Directions


Recipes containing "Thai" and "coconut" have a 99.999% chance of getting pinned. The .001% accounts for the possibility of an accompanying terrible ingredient like raisins. Or hair (but mostly raisins). Lucky for me, Skinnytaste's Red Thai Coconut Curry Shrimp contains neither.
I was a little nervous going into this, as my biggest successes so far have been soups, salads, baked goods and crock pot dinners... AKA dump stuff in a bowl then either eat it right away or wait until it's done. This was easy peasy though, and so good! I love the way it makes my whole apartment smell like coconut.
I linked some of the ingredients below so you can see which brands I used. Your local supermarket should have all of this stuff. This recipe moves fast, but you'll be fine as long as you chop and mince everything beforehand. With rice, it made enough for 4 lunches.
Red Thai Coconut Curry Shrimp
From Skinnytaste
Ingredients
- 1 tsp oil - Canola, vegetable, something bland
- 1 tbsp Thai red curry paste
- 2 tsp fish sauce
- 6 oz light coconut milk
- 4 scallions, chopped - Separate the whites and greens
- 2 cloves garlic, minced
- 1/4 cup fresh cilantro, chopped
- 1 pound shrimp, peeled and deveined - Go with the frozen kind, less work for you!
- salt to taste
Directions
- Heat oil in a large nonstick skillet on medium-high.
- Add scallion whites and red curry paste, saute for about a minute.
- Throw in shrimp and garlic, season with salt, cook for 2-3 minutes.
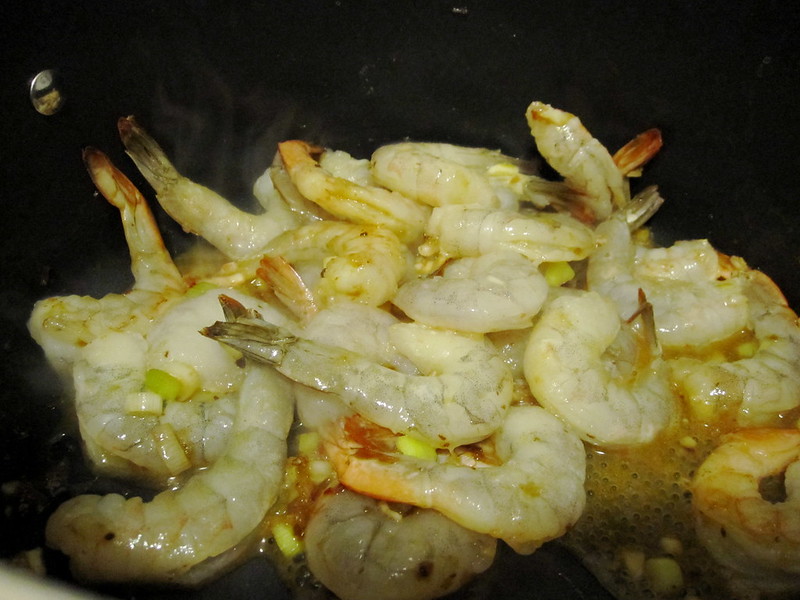
- Add coconut milk and fish sauce, mix well, and simmer until shrimp is cooked through (2-3 minutes, longer if shrimp is frozen but still pretty quick).
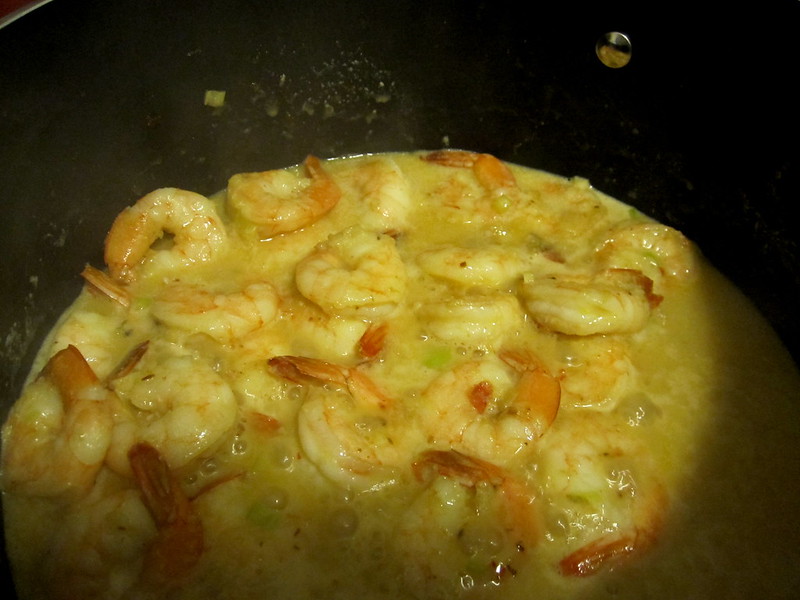
- Remove from heat, then add scallion greens and cilantro.
- Serve over rice and eat your heart out!
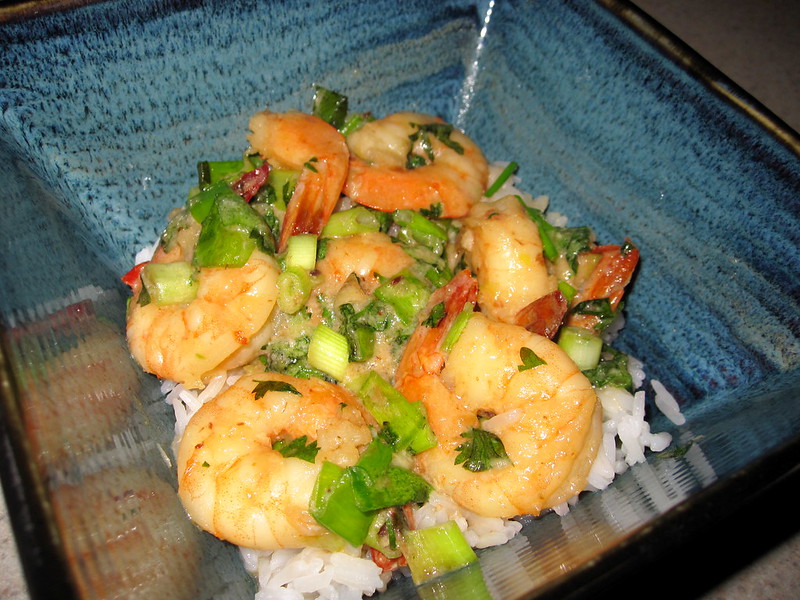
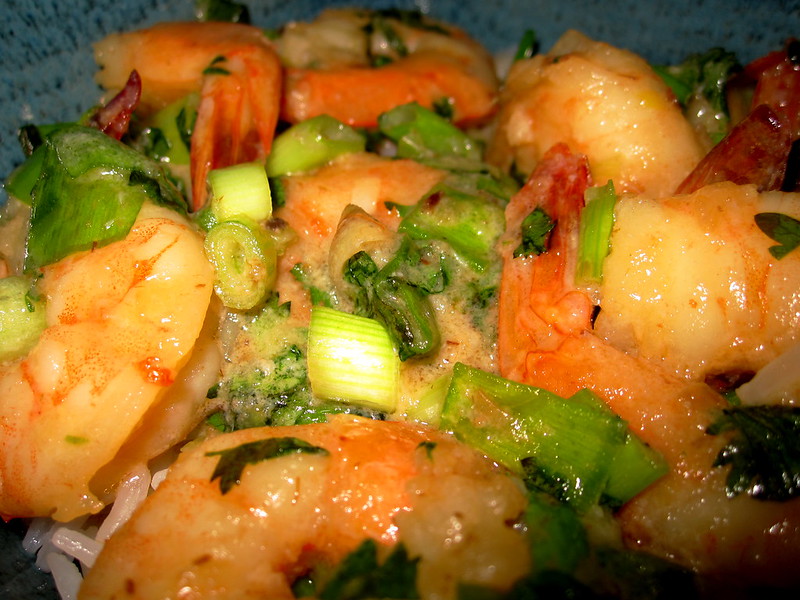 |
| I have yet to perfect the art of cooking rice, but that's a whole other blog post. |

Thursday, June 14, 2012
I'm a winner!
Though I do have an overinflated ego at times, I honestly am a winner. Emily from Emily Bites notified me earlier this week that I was a winner of her Wholly Guacamole giveaway, and the goods arrived today!
While I haven't "rocked the guac" just yet, I did crack open the Classic Medium Salsa to go with a Mexican egg scramble.
I have a lot of salsa and guac to work through, so I'm opening the floor to you! What should I make? Suggest a recipe. I'll make it, and I'll write about it. Here are the options:
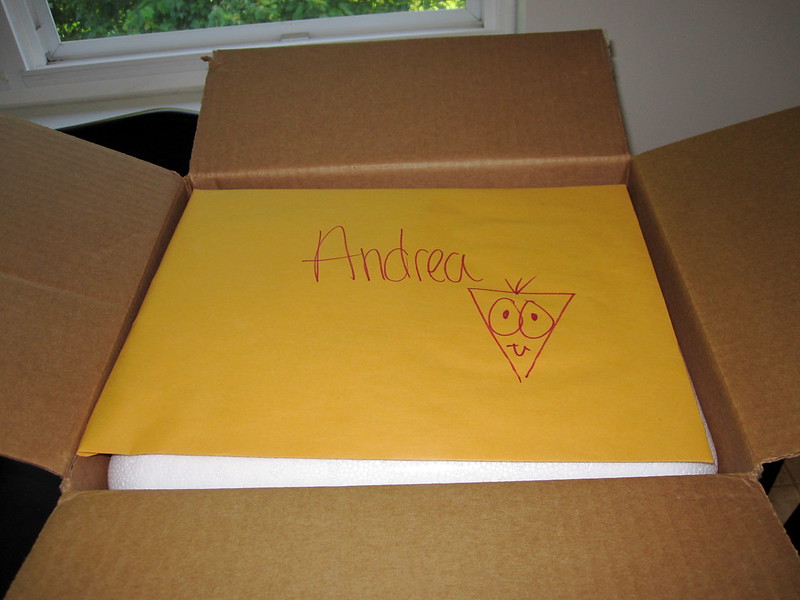 |
| I squealed. Not gonna lie. |
 |
| Check out this haul! The avocado on the right is an adorable squishy stress ball. |
While I haven't "rocked the guac" just yet, I did crack open the Classic Medium Salsa to go with a Mexican egg scramble.
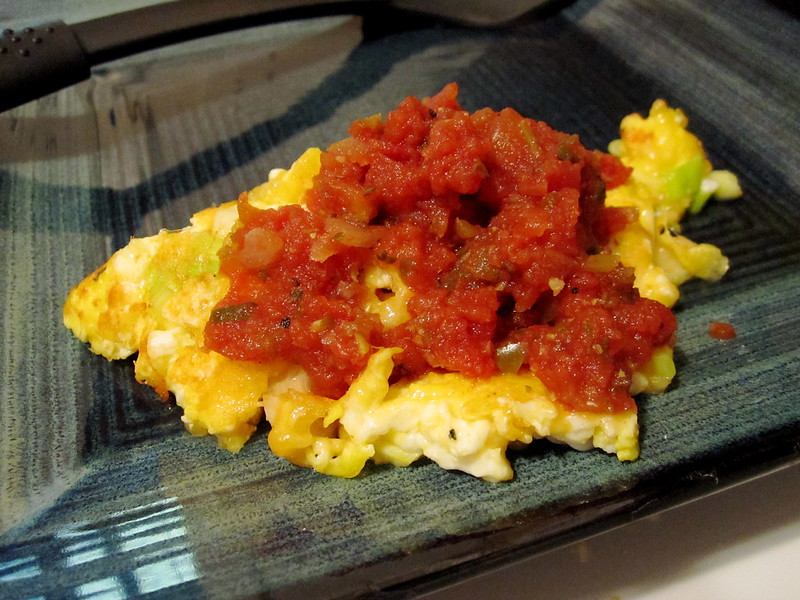 |
| 2 eggs, shredded taco cheese, chopped scallion. Not pictured: Tater tots. Dinner of champions. |
I have a lot of salsa and guac to work through, so I'm opening the floor to you! What should I make? Suggest a recipe. I'll make it, and I'll write about it. Here are the options:
Wednesday, June 13, 2012
Summer salads, had me a blast.
I did it! I found the perfect summer meal, no grilling required. Nothing against grills personally, my apartment complex doesn't allow them.


Don't worry, future grill. Our time will come.
Arugula salmon salad? Meet watermelon feta salad with mint. So many good things happening on this plate.
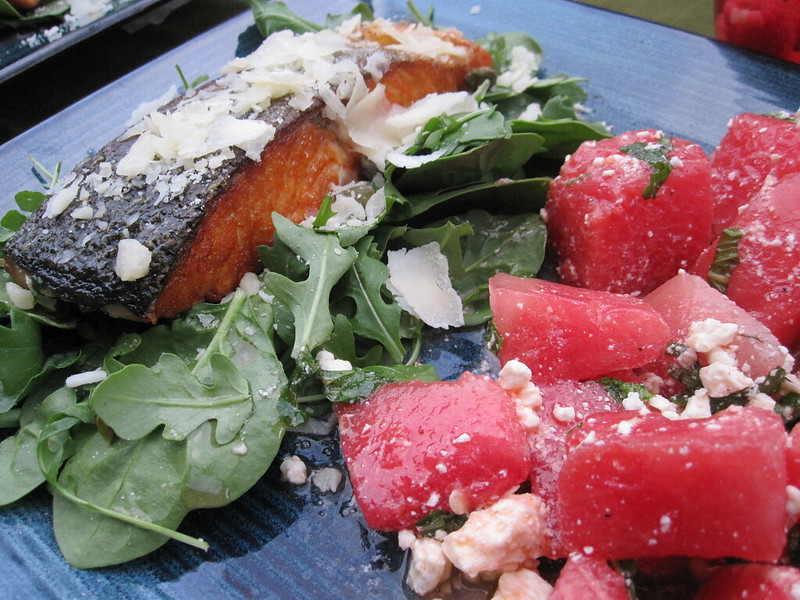
Arugula & Spinach Salmon Salad with Capers and Shaved Parmesan
Adapted from Skinnytaste
Ingredients
- 1 cup arugula
- 1 cup baby spinach
- If you're really fond of one of these greens, double your favorite and cut out the other one altogether! Or, use a different green. The power is YOURS!
- 4 ounces salmon, skin removed (optional)
- 1 tsp capers, drained
- 2 tsp red wine vinegar
- 1 tsp extra virgin olive oil
- 1 tbsp shaved parmesan
- salt and pepper to taste
- Season salmon with salt and pepper. Cook in pan with oil or grill for 10 minutes. Remove the salmon skin if you want to be healthy.
- Place greens on plate, sprinkle with salt and pepper.
- Top greens with salmon and capers.
- Drizzle oil and vinegar, then sprinkle parmesan. As you can see above, I used way more than 1 tablespoon.
Watermelon Feta Salad with Mint
Ingredients
- Seedless watermelon, chilled
- Extra virgin olive oil
- Lime juice
- Fresh mint leaves, chopped
- Crumbled feta
- Salt and pepper
- Cut rind from the watermelon, the cut into 1-inch chunks. Place in colander and drain.
- In a small bowl, whisk together olive oil, lime juice, salt and pepper.
- Place watermelon in a bowl, toss with dressing and mint.
- Add feta, stir to combine thoroughly.
- Serve with a slotted spoon so watermelon juice stays away from the rest of your food. Unless you really like watermelon juice.
Three notes:
- I purposely omitted amounts from the ingredients. I didn't make as much as the original recipe called for, so I just eyeballed it.
- Make this salad just before serving.
- Try to avoid leftovers. It doesn't keep well. The dressing congeals and it's just gross.

Looks great, doesn't it? With sangria to drink, everything about this meal just oozes summer.

Wednesday, April 25, 2012
This bread is bananas. B-A-N-A-N-A-S.
I've always been a master procrastinator, but Spring 2012 has been the semester of baking. Why do schoolwork when I can make stuff that I can stuff my face with?
Someone told me you can freeze bananas for later use in banana bread. This was great news because whenever I buy bananas, I get sick of them before I finish the bunch. One or two get all brown and gross, and I chuck them into the woods outside my apartment in hopes that local deer or squirrels will enjoy the potassi-yummy goodness.
When my next banana started to turn, I just threw the whole thing in the freezer. I wasn't really thinking ahead.
A better idea is to cut the banana into pieces and put them in a freezer bag.
Thankfully, bananas thaw quickly. When they do, you basically throw everything into a bowl, mix it up, pour it in a pan, and bake it.
Someone told me you can freeze bananas for later use in banana bread. This was great news because whenever I buy bananas, I get sick of them before I finish the bunch. One or two get all brown and gross, and I chuck them into the woods outside my apartment in hopes that local deer or squirrels will enjoy the potassi-yummy goodness.
When my next banana started to turn, I just threw the whole thing in the freezer. I wasn't really thinking ahead.
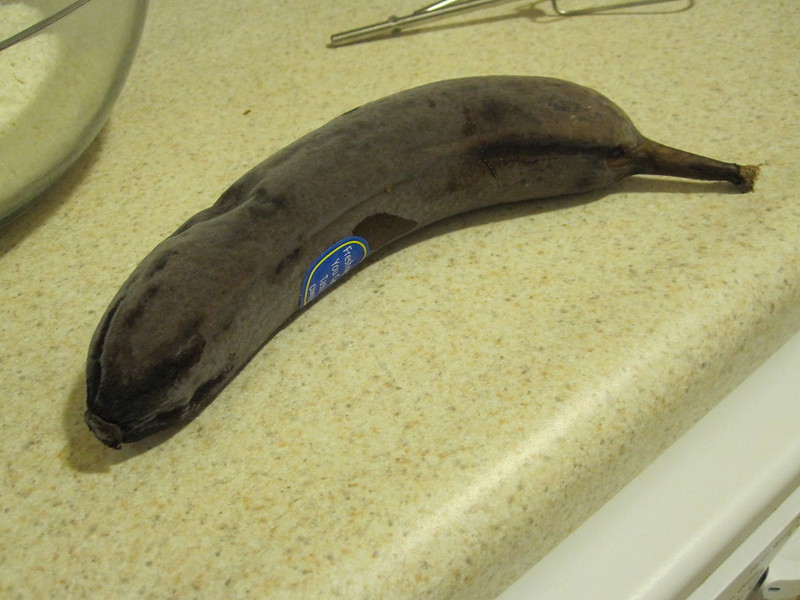 |
| Oh let me be your sledgehammer. |
A better idea is to cut the banana into pieces and put them in a freezer bag.
 |
| Don't mind the freezerburn. |
Thankfully, bananas thaw quickly. When they do, you basically throw everything into a bowl, mix it up, pour it in a pan, and bake it.
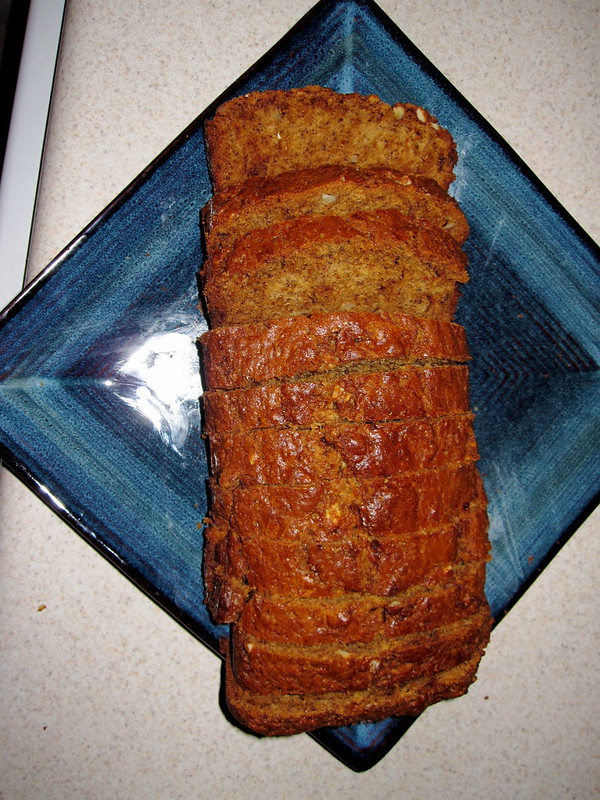 |
| Bready to eat! |
It tastes good, and it makes your home smell good. And if you're like me and require constant validation, bring a loaf to work and bask in compliments.
Banana Banana Bread (Allrecipes)
Ingredients
2 cups all-purpose flour
1 teaspoon baking soda
1/4 teaspoon salt
1/2 cup butter, softened
3/4 cup brown sugar
2 eggs, beaten
2 1/3 cups mashed overripe bananas
Directions
Ingredients
2 cups all-purpose flour
1 teaspoon baking soda
1/4 teaspoon salt
1/2 cup butter, softened
3/4 cup brown sugar
2 eggs, beaten
2 1/3 cups mashed overripe bananas
Directions
- Preheat oven to 350 degrees F.
- Lightly grease a loaf pan.
- Combine flour, baking soda and salt in a large bowl.
- Combine butter, and brown sugar in a separate bowl. Stir in eggs and bananas until well-blended.
- Add banana mixture to flour mixture, stir until moistened.
- Pour batter into pan, bake for 60-65 minutes.
- When the toothpick test says its done, remove from oven and let cool in pan for 10 minutes.
- Flip bread out onto a wire rack and let sit until cool.
- Cut and serve.

Saturday, March 10, 2012
DIY Spice Rack or Magnets, how do they work?
Apartments never have enough cabinet space, do they? In the nine months I've lived here, I've amassed quite the collection of spices. Most were from the supermarket, but others I dried myself and stored in ziplock bags. I quickly grew tired of digging through my "collection" to find what I needed.
How could I solve this problem? Countertop spice racks were out of the question, as I have less counter space than cabinet space. Plus, they all seemed to come with spices. I already had spices, hence my issue. I didn't need more!
A wall-mounted spice rack seemed the way to go, but the reasonably priced ones I found online were ugly. It was during this search that I discovered magnetic spice racks, and thought they were the perfect solution. Sleek! Shiny! Space-saving! But the prefab racks were so expensive, and some didn't hold many jars at all.
I decided to DIY it. Using theKitchn's article on making your own magnetic spice rack as reference, I got to it.
When the glue is dry, place the flat lids that came with the jars over the magnets. They're a perfect fit, stay in place due to the magnets, and will keep the spices from coming in contact with the magnets.
Pour spices into the jars and label. You can make your own labels, or buy some really cute ones on Etsy, but I just used the ones that came with the jars.
Place jars on rack.
Step 6: Admire your handiwork
Of course I'll have to patch up the holes when I move out, but whatever. I'm so happy with how it turned out! I don't have a lot of DIY or handyperson experience, so this was a perfect starter project. Try it out, and you'll feel like Bob Vila (or Bob the Builder) when you're done!
Best part, I've regained some of my cabinet space! Not all, as I bought some very large spice jars from the Christmas Tree Shops, and have a few duplicates due to not checking what I already have in stock before I go shopping.
Seriously, give it a try, you'll be amazed at what you can do!
Pin It
How could I solve this problem? Countertop spice racks were out of the question, as I have less counter space than cabinet space. Plus, they all seemed to come with spices. I already had spices, hence my issue. I didn't need more!
A wall-mounted spice rack seemed the way to go, but the reasonably priced ones I found online were ugly. It was during this search that I discovered magnetic spice racks, and thought they were the perfect solution. Sleek! Shiny! Space-saving! But the prefab racks were so expensive, and some didn't hold many jars at all.
I decided to DIY it. Using theKitchn's article on making your own magnetic spice rack as reference, I got to it.
Step 1: Prepare the back
I decided to drill 7 holes in the sheet metal: 3 along the top, 1 on each side in the middle, and 1 on each bottom corner. Place painters tape over each drilling area before you start. Sand each hole after drilling to remove any pointy bits, and mop up any shavings with some more tape.
Step 2: Prepare the wall
This part is easier with two people. Hold the sheet metal against the wall where your rack will hang, then drill holes in the wall.
Insert drywall anchors into the holes for maximum holding capability.

Step 3: Pretty-fy the back
This step is optional. I was originally going to go with plain metal, but I stumbled across a tablecloth in Target which matched my dishtowels perfectly. Fate?
Lay the metal on the tablecloth, or whichever fabric you've chosen. Cut around the metal, leaving about 1 inch extra around. It doesn't have to be exact.
Do this next part outside, or in a well-ventilated area away from pets, kids, or valuables. Lay the sheet metal on the dropcloth, then coat with the spray glue. Smooth the fabric over the metal and let sit for 15-20 minutes. Then flip the metal over, spray the perimeter, tightly pull the edges of the fabric over and smooth. Let it sit for some more.
Once dry, find the holes under the fabric and drill so you're not blindly searching when it comes time to hang on the wall.
Step 4: Hang on wall
Again, this part's easier with help. Hold the metal up to the wall, place a washer on the screw, then drill into the wall.
Step 5: Assemble the jars
I decided to drill 7 holes in the sheet metal: 3 along the top, 1 on each side in the middle, and 1 on each bottom corner. Place painters tape over each drilling area before you start. Sand each hole after drilling to remove any pointy bits, and mop up any shavings with some more tape.
 |
| Use tape to pick up metal shavings after drilling. |
Step 2: Prepare the wall
This part is easier with two people. Hold the sheet metal against the wall where your rack will hang, then drill holes in the wall.
 |
| A folded post-it note catches stray drywall dust! |
Insert drywall anchors into the holes for maximum holding capability.
Step 3: Pretty-fy the back
This step is optional. I was originally going to go with plain metal, but I stumbled across a tablecloth in Target which matched my dishtowels perfectly. Fate?
Lay the metal on the tablecloth, or whichever fabric you've chosen. Cut around the metal, leaving about 1 inch extra around. It doesn't have to be exact.
Do this next part outside, or in a well-ventilated area away from pets, kids, or valuables. Lay the sheet metal on the dropcloth, then coat with the spray glue. Smooth the fabric over the metal and let sit for 15-20 minutes. Then flip the metal over, spray the perimeter, tightly pull the edges of the fabric over and smooth. Let it sit for some more.
Once dry, find the holes under the fabric and drill so you're not blindly searching when it comes time to hang on the wall.
Step 4: Hang on wall
Again, this part's easier with help. Hold the metal up to the wall, place a washer on the screw, then drill into the wall.
Step 5: Assemble the jars
Mason jars come with 2-piece lids (ring and flat lid). I was concerned about spills when prying off the flat lid, and didn't want to glue the pieces together, so I bought the 1-piece lids.
I glued 3 magnets to the inside of the lid in a triangle formation. These magnets are crazy strong and quite fond of each other. After gluing, hold down the magnets for a bit so they don't merge in the middle.
 |
| Be careful with these magnets! Keep out of reach of kids and pets. |
When the glue is dry, place the flat lids that came with the jars over the magnets. They're a perfect fit, stay in place due to the magnets, and will keep the spices from coming in contact with the magnets.
 |
| No glue required. |
Pour spices into the jars and label. You can make your own labels, or buy some really cute ones on Etsy, but I just used the ones that came with the jars.
Place jars on rack.
Step 6: Admire your handiwork
 |
| Nice rack! |
Of course I'll have to patch up the holes when I move out, but whatever. I'm so happy with how it turned out! I don't have a lot of DIY or handyperson experience, so this was a perfect starter project. Try it out, and you'll feel like Bob Vila (or Bob the Builder) when you're done!
Best part, I've regained some of my cabinet space! Not all, as I bought some very large spice jars from the Christmas Tree Shops, and have a few duplicates due to not checking what I already have in stock before I go shopping.
 |  |
| Before | After |
| (Click photos to enlarge) | |
Materials used:
- Pre-cut stainless steel (24"x30"), drywall anchors, drywall screws, washers, epoxy, spray glue, and dropcloth: Lowe's
- 4-ounce mason jars and one-piece lids: Fillmore Container (buy only "food safe" lids)
- Neodymium magnets (1/2"x1/8"): Almost Free Magnets (look for factory seconds to save money!)
- Tablecloth for stylish cover: Target
All of the above merchants receive my wholehearted stamp of approval. Fillmore let me specify exactly how many lids I wanted, where other vendors wanted me to buy a lot in bulk. The magnets were shipped from Hawaii and I got them in less than a week!
Seriously, give it a try, you'll be amazed at what you can do!
Pin It
Wednesday, March 7, 2012
Spice up your life, AKA my mouth is on fire
Sure, make fun of me for quoting the Spice Girls. As long as I can make fun of you for recognizing it.
A dear friend turned me onto Emily Bites, a "cooking light" kind of blog with droolworthy recipes. There, I spotted a recipe that made the clouds part and angels sing. That or I was really in the mood for pasta.
Spicy Sausage & Eggplant Spaghetti Bake
From Emily Bites
Ingredients:
1 large eggplant, cut into 1-inch square pieces
2 tbsp extra virgin olive oil, divided in 2
4 oz dry wheat spaghetti
1 cup red onion, diced
2 garlic cloves, minced
1/2 lb hot Italian turkey or chicken sausage, casings removed
1 1/2 cups marinara sauce
2 tsp crushed red pepper flakes
1 cup 2% or skim shredded Mozzarella cheese
3/4 cup grated Parmesan cheese, divided into 1/2 cup and 1/4 cup
1/4 cup seasoned bread crumbs
Salt and pepper to taste
Cooking spray
Basil leaves, sliced (optional)
Directions:
Pin It
A dear friend turned me onto Emily Bites, a "cooking light" kind of blog with droolworthy recipes. There, I spotted a recipe that made the clouds part and angels sing. That or I was really in the mood for pasta.
Spicy Sausage & Eggplant Spaghetti Bake
From Emily Bites
Ingredients:
1 large eggplant, cut into 1-inch square pieces
2 tbsp extra virgin olive oil, divided in 2
4 oz dry wheat spaghetti
1 cup red onion, diced
2 garlic cloves, minced
1/2 lb hot Italian turkey or chicken sausage, casings removed
1 1/2 cups marinara sauce
2 tsp crushed red pepper flakes
1 cup 2% or skim shredded Mozzarella cheese
3/4 cup grated Parmesan cheese, divided into 1/2 cup and 1/4 cup
1/4 cup seasoned bread crumbs
Salt and pepper to taste
Cooking spray
Basil leaves, sliced (optional)
Directions:
- Preheat oven to 400. Spray baking sheet to coat and set aside.
- In a large bowl, toss eggplant with 1 tablespoon of olive oil, and salt and pepper to taste, until eggplant is lightly coated. Spread eggplant in a single layer on the baking sheet and bake for 30 minutes.
- While the eggplant bakes, bring a pot of water to a boil, then cook the spaghetti until it is al dente. Drain pasta, reserving about 1/3 cup of the pasta water. Set aside.
- While the water is boiling and/or pasta is cooking, pour the other tablespoon of olive oil into a large pot and heat on medium. Add onion and cook for a few minutes, until soft and almost translucent. Add garlic and cook for another 1-2 minutes.
- Add sausage to garlic and onions, breaking up into chunks with a wooden spoon. Stir in marinara and turn heat down to low.
- When eggplant is ready, remove from oven and set aside. Turn oven down to 375, spray a baking dish and set aside.
- Add drained spaghetti to sauce mixture and stir to coat.
Add eggplant and crushed red pepper, stir to combine. Remove from heat for 10 minutes.COAT'D! - Add mozzarella, 1/2 cup of Parmesan and the 1/3 cup of reserved pasta water, stir until well combined.
- Pour mixture into baking dish and spread out evenly. Top with bread crumbs and remaining Parmesan.
- Bake for 25 minutes or until bread crumbs are golden brown and cheese is bubbling.
- Top with basil leaves (optional) and serve.
 |
| Eggplant, not hash browns |


 |
| Let's eat! |
Notes:
- This is a great recipe to make on Sunday and bring to work for lunch all week.
- Yowza, this dish was hot! The sausages had enough heat for me, so next time I'll do without the crushed red pepper entirely. I had to add extra cheese and sauce so I could eat without pain.
- There's debate over whether peeling eggplant is necessary. I did for this dish, but will refrain next time to see if there's a noticeable difference. Plus, the New York Times told me not to.
- Hey ShopRite, thanks for driving me batshit crazy. Why on earth would you put all of your wheat pasta, including non-organic brands, in the organic section?
- Get the bread crumbs without cheese to lighten this recipe up further. There's already lots of cheese in here, how much more do you need? Don't answer that.
- It helps to chop up the onion and garlic prior to starting. I felt rushed getting everything together on the fly, and burned the onion while mincing the garlic.
- Speaking of rushed, there's a lot of "doing stuff while other stuff is going on" which stressed me out a little. I need to work on time management or just chill out.
- Use a large pot to saute the onion and garlic. It'll be easier to add everything else to it later.
- I used Thin & Trim Spicy Italian Chicken Sausages. I don't think they were encased, but that didn't stop me from trying to remove the casing from one poor sausage anyway. I gave up after that one. Oh, and they're already cooked so no need to worry about disgusting raw chicken.
- Recipe calls for a 7x11 baking dish. All I had was 9x13. It came out fine, just flatter.

Subscribe to:
Posts (Atom)