Showing posts with label chicken. Show all posts

Tuesday, July 31, 2012

Rockin' the Guac

I reached out to the Twitterverse for suggestions on what to do with my windfall of salsa and guac from the Emily Bites Wholly Guacamole giveaway. Ms. Bites herself suggested taco cupcakes. Who am I to bite the hand that feeds me, especially when she also (indirectly) fed one Anderson Cooper?

Working with wonton wrappers was surprisingly easy. They come pre-floured so they don't stick together, and you can freeze what you don't use.

You'll find I deviated a bit from Emily's recipe to account for personal taste and to make enough leftovers for lunches. It's not the healthiest of meals, but it's fun to make and eat. If you have leftover meat and toppings, make yourself some rockin' taco salads. There is no downside to any of this.

Taco "Cupcakes"
Adapted from Emily Bites

Ingredients

Directions:
  1. Preheat oven to 375. Spray muffin tin with non-stick spray and set aside.
  2. Add chicken to skillet, then add taco seasoning. Stir occasionally until browned.
  3. Add black beans and keep cooking until warm.
  4. Press a wonton wrapper into each cup of the muffin tin.
  5. Dab about a teaspoon of the salsa con queso into each cup and spread it out around the bottom.
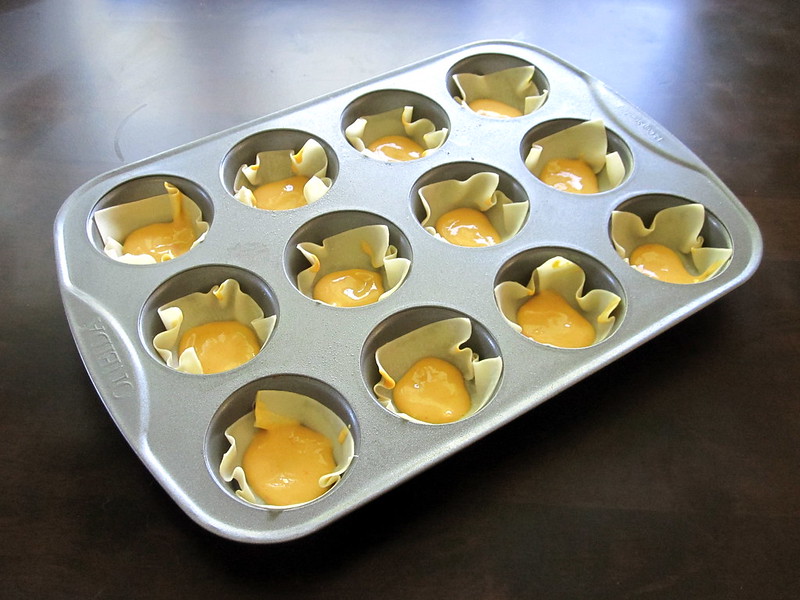
Yeah... that's more than a teaspoon.
  1. Add about a tablespoon of the chicken/bean mixture to each cup.
  2. Add just enough salsa to cover, then sprinkle shredded cheese on top.
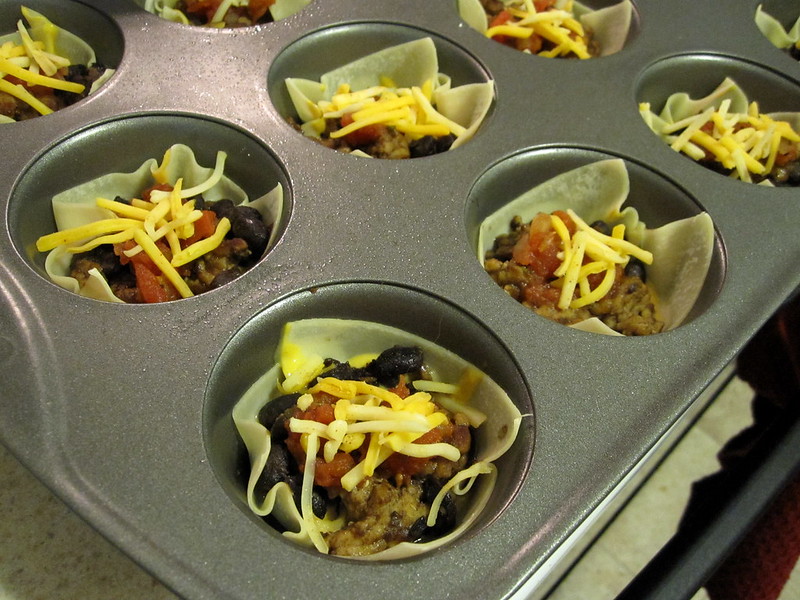
  1. Press another wonton wrapper on top to smoosh everything down (but not too much), rotated 45 degrees from the first wrapper for maximum visual appeal.
  2. Repeat steps 5-7.
  3. Bake 18-20 minutes or until golden brown.  Let cool for a few minutes before removing from the muffin tin.
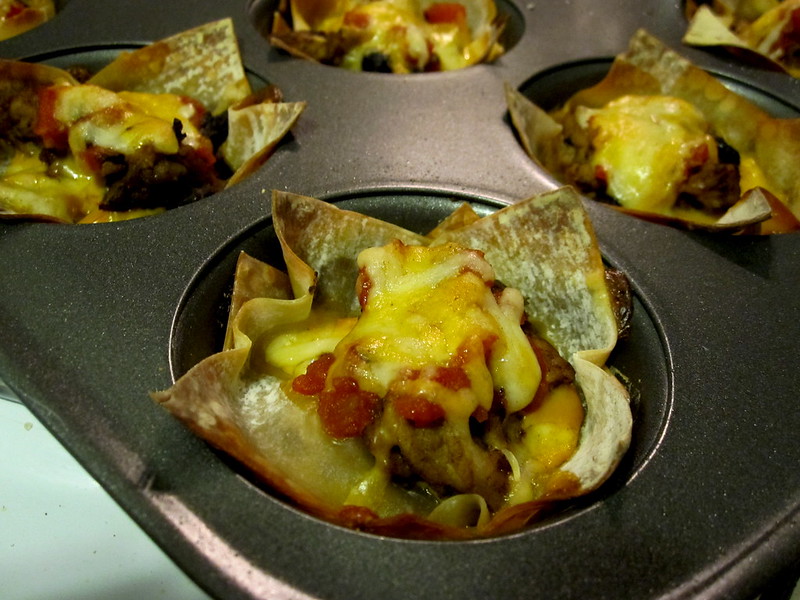
  1. Dab your favorite Wholly Guacamole on top, and enjoy!
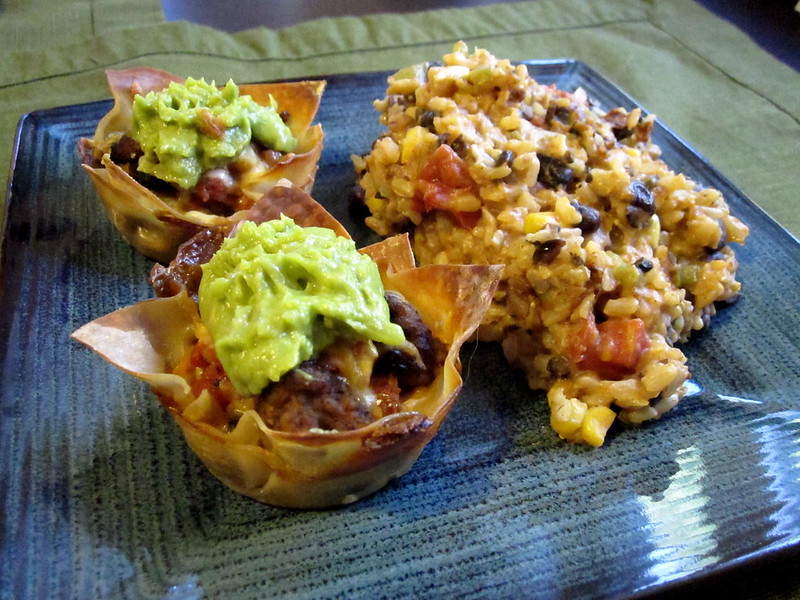
Served with Emily Bites' Cheesy Amazing Mexi-Rice,
which was both cheesy and amazing.

Wednesday, March 7, 2012

Spice up your life, AKA my mouth is on fire

Sure, make fun of me for quoting the Spice Girls. As long as I can make fun of you for recognizing it.

A dear friend turned me onto Emily Bites, a "cooking light" kind of blog with droolworthy recipes. There, I spotted a recipe that made the clouds part and angels sing. That or I was really in the mood for pasta.

Spicy Sausage & Eggplant Spaghetti Bake
From Emily Bites

Ingredients:
1 large eggplant, cut into 1-inch square pieces
2 tbsp extra virgin olive oil, divided in 2
4 oz dry wheat spaghetti
1 cup red onion, diced
2 garlic cloves, minced
1/2 lb hot Italian turkey or chicken sausage, casings removed
1 1/2 cups marinara sauce
2 tsp crushed red pepper flakes
1 cup 2% or skim shredded Mozzarella cheese
3/4 cup grated Parmesan cheese, divided into 1/2 cup and 1/4 cup
1/4 cup seasoned bread crumbs
Salt and pepper to taste
Cooking spray
Basil leaves, sliced (optional)


Directions:
  1. Preheat oven to 400. Spray baking sheet to coat and set aside.
  2. In a large bowl, toss eggplant with 1 tablespoon of olive oil, and salt and pepper to taste, until eggplant is lightly coated. Spread eggplant in a single layer on the baking sheet and bake for 30 minutes.
  3. Eggplant, not hash browns
  4. While the eggplant bakes, bring a pot of water to a boil, then cook the spaghetti until it is al dente. Drain pasta, reserving about 1/3 cup of the pasta water. Set aside.
  5. While the water is boiling and/or pasta is cooking, pour the other tablespoon of olive oil into a large pot and heat on medium. Add onion and cook for a few minutes, until soft and almost translucent. Add garlic and cook for another 1-2 minutes.
  6. Add sausage to garlic and onions, breaking up into chunks with a wooden spoon. Stir in marinara and turn heat down to low.
  7. When eggplant is ready, remove from oven and set aside. Turn oven down to 375, spray a baking dish and set aside.
  8. Add drained spaghetti to sauce mixture and stir to coat.
  9. COAT'D!
    Add eggplant and crushed red pepper, stir to combine. 
    Remove from heat for 10 minutes. 
  10. Add mozzarella, 1/2 cup of Parmesan and the 1/3 cup of reserved pasta water, stir until well combined.
  11. Pour mixture into baking dish and spread out evenly. Top with bread crumbs and remaining Parmesan.
  12. Bake for 25 minutes or until bread crumbs are golden brown and cheese is bubbling.
  13. Top with basil leaves (optional) and serve.
  14. Let's eat!
    Notes:
    1. This is a great recipe to make on Sunday and bring to work for lunch all week.
    2. Yowza, this dish was hot! The sausages had enough heat for me, so next time I'll do without the crushed red pepper entirely. I had to add extra cheese and sauce so I could eat without pain.
    3. There's debate over whether peeling eggplant is necessary. I did for this dish, but will refrain next time to see if there's a noticeable difference. Plus, the New York Times told me not to.
    4. Hey ShopRite, thanks for driving me batshit crazy. Why on earth would you put all of your wheat pasta, including non-organic brands, in the organic section?
    5. Get the bread crumbs without cheese to lighten this recipe up further. There's already lots of cheese in here, how much more do you need? Don't answer that.
    6. It helps to chop up the onion and garlic prior to starting. I felt rushed getting everything together on the fly, and burned the onion while mincing the garlic.
    7. Speaking of rushed, there's a lot of "doing stuff while other stuff is going on" which stressed me out a little. I need to work on time management or just chill out.
    8. Use a large pot to saute the onion and garlic.  It'll be easier to add everything else to it later.
    9. I used Thin & Trim Spicy Italian Chicken Sausages. I don't think they were encased, but that didn't stop me from trying to remove the casing from one poor sausage anyway. I gave up after that one. Oh, and they're already cooked so no need to worry about disgusting raw chicken.
    10. Recipe calls for a 7x11 baking dish. All I had was 9x13. It came out fine, just flatter.
      Pin It

      Monday, November 15, 2010

      Gluten-free cooking

      While planning the menu for my husband's birthday party, I was faced with a challenge.  How can I feed my dear, gluten-free friend Karen without making her sick?  Rather than making one dish just for her, I decided to deglutenize dinner entirely!

      First off, major kudos to Hannaford for having a whole gluten-free section.  Thanks for making my life easy.

      Entree 1: Lasagna
      Easy. I picked up some rice noodles, made one pan of lasagna with meat sauce, and one pan with marinara sauce. Hannaford carries DeBoles noodles; I don't know if they're the Rolls Royce of gluten-free noodles or what, but use enough cheese and sauce and anything will taste fine.

      Entree 2: Chicken Parmesan
      I had fun with this.  The store sold bags of readymade gluten-free bread crumbs, but they were really expensive for such a small bag.  In a rare flash of brilliance, I bought two loaves of sliced white gluten-free bread and decided to make my own.
      1. Get toasty.  Throw the slices right on the rack at 250 degrees. Bake for 10, then flip and bake for another 10.

        I was glad to do this because I tasted a "raw" slice, and honestly? Yuck. Burn, nasty bread, burn!
      2. Pulverize!  Throw those slices into the food processor and process the shit out of it. 
      3. Spice it up.  Add parsley, oregano, basil, garlic powder, onion powder and salt.  Just eyeball it until it looks like the stuff you buy in a can.

        That nasty bread doesn't taste so nasty now!
      4. Follow your favorite chicken parm recipe.
        Entree 3: Sausage and Peppers
        No gluten to avoid, and stupidly easy to make.

        Of course, I didn't take any pictures of the finished products.  But everyone ate it, everyone LIKED it, and most importantly, it didn't kill Karen. Mission accomplished!

        Thursday, April 22, 2010

        6,000 chicken fajitas, please.

        Don't lie, you know you always pronounce it "fah-jye-tuhs" like Peter Griffin.

        Gentle reader and friend Erica answered my plea for easy recipes and came through with chicken fajitas. They were definitely easy, and very tasty!

        Erica's Mom's Chicken Fajitas
        • 1 lb chicken, cut into thin strips
        • 1 cup mild garden salsa
        • 1 1/2 cup peppers, sliced
        • 1/2 cup sliced scallions or onions
        • 2 tbsp oil of choice (I used canola, it's what we had in the pantry.)
        • 8 8" tortillas, warmed
        • toppings! (guacamole, sour cream, shredded cheese, etc.)
        1. Cut chicken into thin strips.
          Raw chicken is GROSS. I didn't cut it as thin as I probably should have because I wanted the experience to be over with.
          sliced chicken, pre-marinate

        2. Marinate the chicken in the salsa for 30 minutes in the refrigerator.
          Crap, should've read that part before I decided I was starving.

        3. Slice peppers and onions.

          Pepper fetus!
          pepper fetus!

          sliced peppers

        4. Cook peppers and onions in skillet over medium high heat in oil for ~5 minutes.
          peppers and onions

          Husband chopped up a few cloves of garlic and threw them in after I took this. We are garlic freaks.

        5. Remove peppers and onions (and garlic) with a slotted spoon.

        6. Dump chicken into skillet.

        7. Cook, stirring constantly until meat is cooked.
          See above about being starving and not cutting the chicken into thin enough strips. I was getting cranky around this point.
          cooking the marinated chicken

        8. Add peppers and onions (and garlic) back to skillet, heat through.
          added the peppers and onions back to the skillet

        9. Serve in tortillas with your toppings!

          In case you don't know how to fold a tortilla.
          how to fold a tortilla

          I've made guacamole before, but didn't feel like it this time. Guacamole in a pouch just seems... wrong.
          guac in a pouch
        The best part... leftovers! This is only half. I actually tripled the recipe so we could eat them for lunch all week.
        leftovers
        Big thanks to Erica! I'm feeling much more confident in my cooking abilities now.